Featured

So, You’re Buying a Fixer Upper: Part 2

A large part of this blog is to help my readers save money. One of the biggest reasons to purchase a fixer upper is just for that reason. However, don’t be fooled. Purchasing a fixer upper is an investment so choose wisely when you’re house hunting. Read for financial advice a friend would give you…

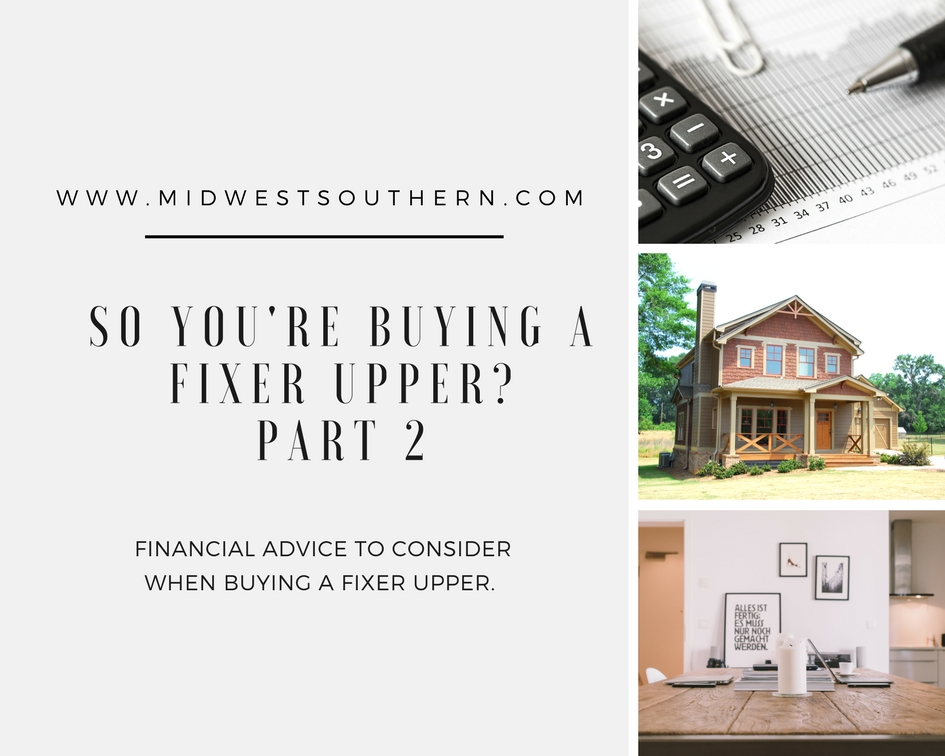
So, You’re Buying a Fixer Upper?
Financial Advice a Friend Would Give You…

A large part of this blog is to help my readers save money. One of the biggest reasons to purchase a fixer upper is just for that reason. However, don’t be fooled. Purchasing a fixer upper is an investment so choose wisely when you’re house hunting. And be sure that your projects will increase the overall value of the home. Here’s some tips for home buyers from things we have learnt through our own home purchases and renovations.

***DISCLAIMER: I do not represent any financial institutions, firms, or am any longer a licensed home loan specialist. This is just friendly advice and a few things to consider.***

Financial Advice 101
Fun fact. I’ve been working in the financial/banking industry the majority of my adult career. Banking is what I did before staying home to take care of our little one. And finance is something I am still passionate about. What I am more passionate about is, being wise with money and not just financing everything. I’m a banker’s worst nightmare… because what I’m about to tell you isn’t going to make them as much money.

He’s right… As Dave Ramsey would say, “Cash is King. Debt is Dumb.” 
The reason we personally settled for a fixer upper is so we didn’t have to pay a huge mortgage… and we didn’t have to worry about additional home equity financing while fixing it up. We pay for the majority of our supplies in cash and we take our time to get things done. It takes time and sacrafice. At the end of the month we only pay on one loan–a modestly priced mortgage. While during renovations it can seem like we aren’t saving like we were prior we still don’t have massive amounts of debt… (like the majority of Americans). We have more freedom when we are spending less. And you do too. My best financial advice is find out what your means really is… and aim to spend even less. Don’t take out a massive mortgage just because you can. Live more freely by having room to breathe at the end of the month. It takes sacrifice but it is totally worth it.

Renovate the FINANCIALLY Smart Way
From my experience of working in the banking industry, when a banker hears you are wanting to work on  a major home renovation they will likely refer you to a home equity line of credit (HELOC). A good banker should warn you that a HELOC can be very risky. In fact, HELOCs are sited to be one of the major reasons for the housing crisis in the early 2000s… the same financial crisis that caused many families to loose their homes!

What makes a HELOC so risky? Simply answered, it’s very easy to over spend on an open ended line of credit. When payback comes around you can easily find yourself scrapping the bottom of an empty barrel. Want more details? Here’s an article  by Kerry Hannon from FORBES, explaining the risks associated with this type of financing, taken from his personal experience. It’s an easy read titled, Cautionary Advice On Getting A Home Equity Line.

So, How Do You Come Up With The Money?
The answer? Simply, budget. Find what you can cut out from your monthly spending and set aside for your project. Maybe that means spending less at Starbucks, not eating out, cutting cable, or selling items you aren’t using… (We did all of that.) Write down a budget and stick to it. Check out Dave Ramsey for more detailed advice.

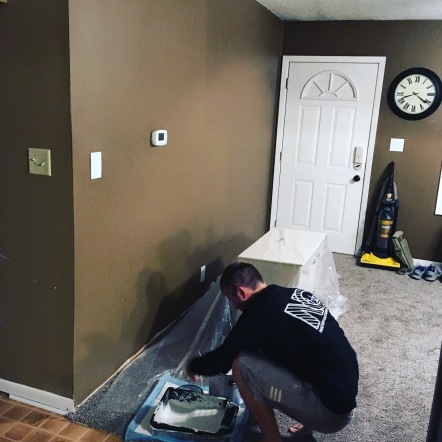
Another budget related idea is to ask yourself, “What can I do myself and what do I need to have hired out?” Don’t take this the wrong way… contractors have a time and place. They are needed. If I could, I would hire out everything. However, when you are on a tight budget you learn very quickly that you can be just as effective in some areas. Maybe you can learn how to lay tile, paint, install flooring, or carpeting. We have taught ourselves so much simply by reading, watching, and asking the right questions.

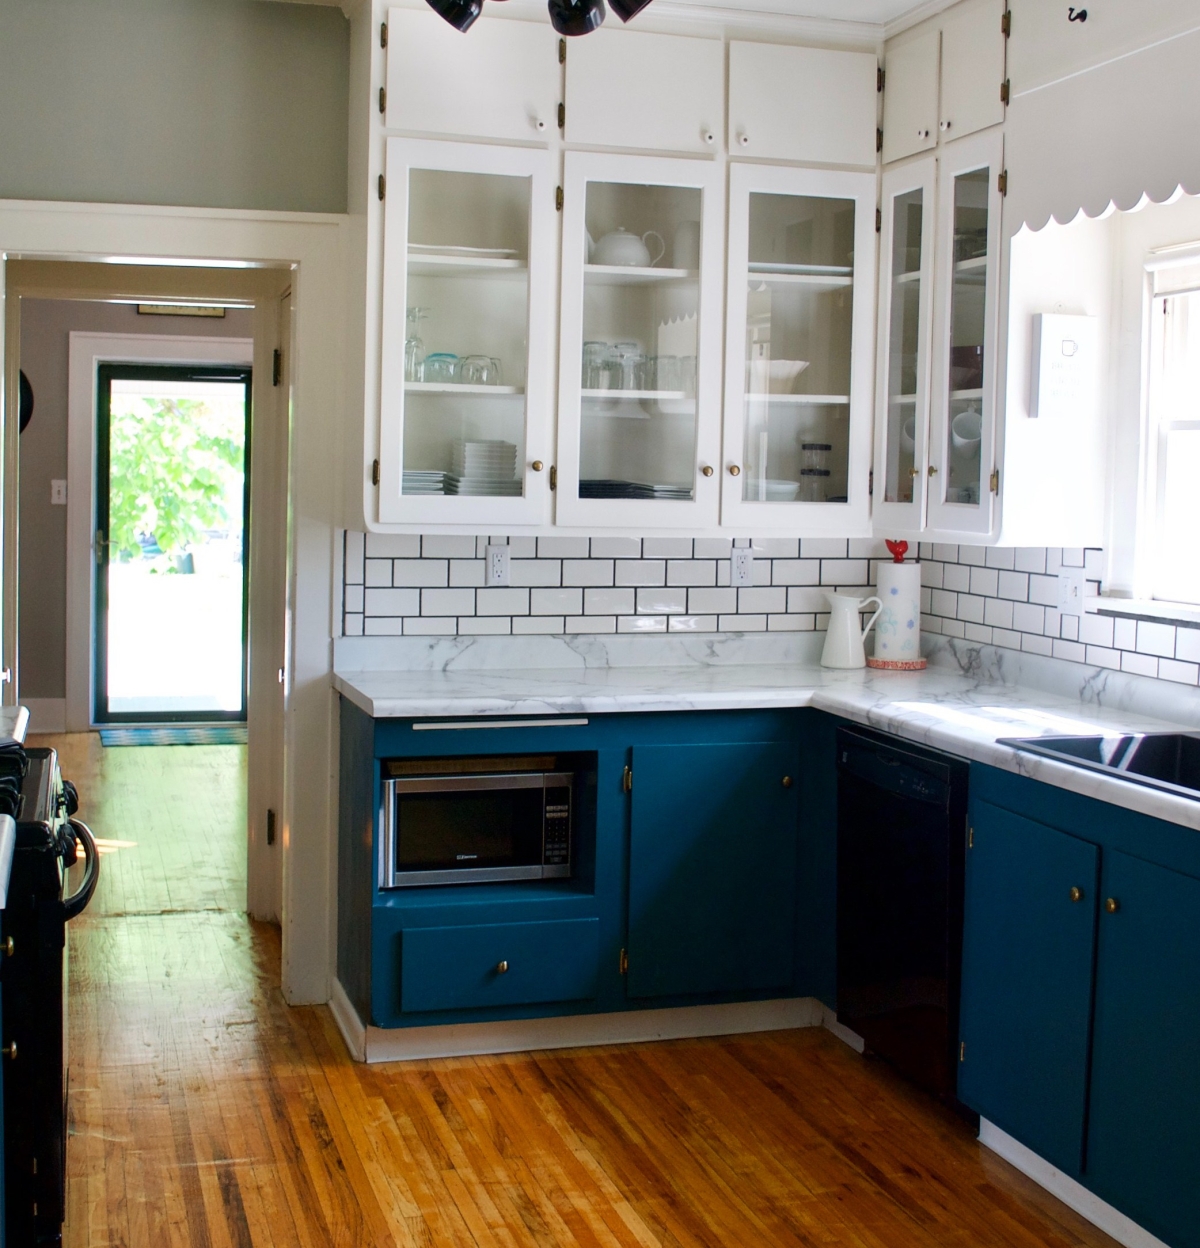
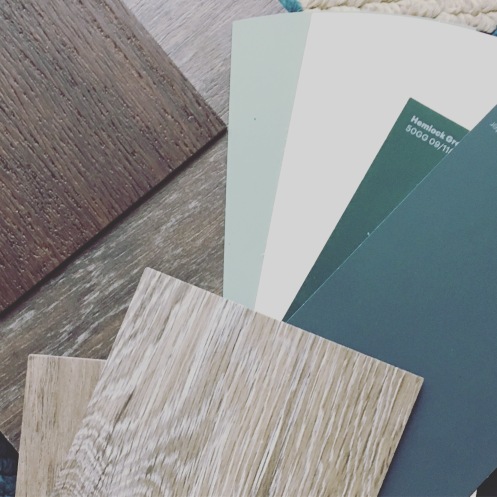
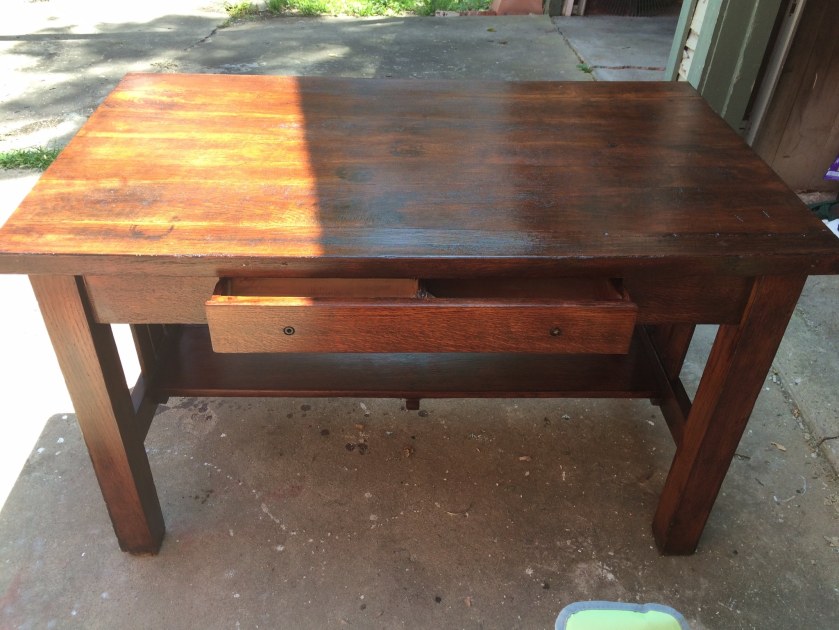
One thing we taught ourselves and saved thousands DIY-ing is refinishing our hardwood floors.

***I recommend though if it can flood your house or burn down your house, you always hire a professional… A plumber and electrician are always a phone call away.***

Invest in the Neighborhood
What are your priorities? Hopefully, you aren’t reading this if you are looking to flip a house solely for profit. However, the neighborhood can determine much about your house and its resale value at the end of the day. If you’re looking to buy your first home be sure that you’ll be happy at that location. While your neighbors may not be perfect make sure you can learn to love them… Get outside, have conversations, and be friendly. There’s nothing worse than living where you feel unsafe, insecure, or just plain unhappy.

Here’s a list of questions about the neighborhood to answer before putting in your first offer:
1. Is the neighborhood safe for my family?
2. Is the neighborhood close to work, school, church, or other frequent destinations?
3. What are the neighbors’ homes like?
4. Is something going to drive you crazy or impact the resale value of the home?
5. Does the neighborhood seem welcoming?
6. Have I seen or been able to interact with any of the neighbors while looking at the home? How was that interaction?

Ask yourself some questions that are important to you. Being honest with yourself can save you stress and hassle later on if for some reason your answers are not what you hoped for. However, remember nothing is perfect and neither are you… so if it’s just small things that don’t make a huge difference be graceful and forgiving.

In closing, these are just a few things to consider when investing in a fixer upper. There are a lot more things to consider but these made my short list from our experiences. If you take anything from this little article it should be to do your research on the financial spectrum. It’s easy to get blindsided when purchasing a new home, fixer upper or not. Be wise when it comes to your finances and you can live a more peaceful life. For more ideas on budgeting, home investing, and budget design follow me on Pinterest and check out my Instagram Stories for weekly inspiration.


Featured

Travel Guide: Magnolia Market and Waco, Texas

Magnolia Silos is the premier destination for any huge Fixer Upper fan. Read for tips and tricks to get the most out of your stay!

Perhaps one of the most memorable Christmas gifts I have ever received was our first “family vacation,” to The Magnolia Silos. With our five month old in tow, we drove all the way to Waco for a mini-vacation a few weeks before Christmas. Waco, Texas is perhaps one of the friendliest towns I have ever been to, and trust me I have done a ton of traveling! 

If you are planning a trip to Waco, I would love to be your guide. I learned a ton about the college town from locals themselves as we traveled throughout the bustling little city. This post will focus on places we visited and other places we will certainly go to on our next visit. Read for more tips and helpful suggestions!
(All Photos by Midwest Southern Blog, unless otherwise stated). 
fullsizeoutput_c47

fullsizeoutput_c1f.jpeg
One of my favorite spots was the garden area. It’s so inspirational!


MY QUICK TIPS FOR MAGNOLIA SILOS:

Magnolia Silos is the premier destination for any huge Fixer Upper fan. We had such an amazing time but I can see how the experience could be stressful if you make a few mistakes. Here are some “fast tips and tricks” to get the most out of your Magnolia experience.

1. Pick a less busy time of the week, if possible. Magnolia is closed on Sundays however, Saturday is generally insanely busy. We went on a Wednesday and Thursday. The crowds were light and lines were short! If you go on a Friday or Saturday know that the lines will be long and crowds will be full. So prepare yourself with a positive, patient attitude. You should be sure to pack that everyday of the week. ; – ). 

2. Pack lightly. When you have kiddos it can get stressful. In order to get into the doors at Magnolia, massive strollers aren’t the easiest thing to navigate. While there are elevators and large walkways, I recommend packing one backpack, and baby wear for a better hands free experience. Magnolia also has a beautiful lawn for kiddos to run and play on. So, if mom wants to do more shopping and dad wants to spend time tossing a ball, Magnolia is the best place to be!

3. Don’t skip the cupcakes or food vendors. Magnolia is such a collective community of Waco, TX. If you attend on a Friday or Saturday you’ll be able to experience a ton of local food trucks parked around the Silos. You can definitely have lunch everyone will enjoy while you hang out near the lawn, listening to live entertainment. And don’t forget to pick up some cupcakes or cookies while you visit, at the Silos Baking Co.
fullsizeoutput_c3f.jpeg

4. NEW! Magnolia made an announcement about the original store on Bosque! The Magnolia Warehouse Shop. Simply, old inventory or slightly damaged inventory will be taken there to be sold at a  large discount. So, if you want to find a deal don’t miss it. Plus, it is such a fun thing to check out if you want to see how Magnolia got its start! The shop is so far open Thursday through Saturday. Check the website for details or changes to the schedule.

5. Magnolia Table. This is a brand new addition to the Magnolia experience. I have heard that the food and menu are to die for! However, be sure to grab a hot coffee or signature lavender tea to sip on while you wait to be seated, on the covered patio. Wait times are long at the moment due to the newness of the restaurant. So, go early and pack that positive and patient attitude!

magnolia-table-menu-1519673805
As seen in: Country Living Magazine.

fullsizeoutput_c49.jpeg


Your Waco Experience.
Where to Stay. What to Eat. Where to Shop. What to Do.

STAY:

The best part about the Silos is there are plenty of places to stay within walking distance. We stayed at the Marriott just three or so blocks north of the Silos. There is also the Hotel Indigo that is a block closer. This was a perfect location because we were able to walk to the Silos each day, not needing to worry about finding a parking space. You can also grab a trolley ride from several  downtown locations as well. Just find a parking garage and hop on!

If you want something a little less generic be sure to check out the many Air BnBs, guest houses, and even cabins for a more unique adventure. If you are traveling in a larger group definitely look into staying at either The Magnolia House or Clint Harp’s old home (The Harp House), next to his shop! They are pricey and hard to get into but they are worth the shot; especially if you’re traveling with a large group!

EAT:

Obviously, a trip to Magnolia Table is on the must do list for next time we venture down to Waco. However, that wasn’t around when we last visited. We certainly enjoyed a few nice meals and plan to stop at a few different locations next time we visit. Here is a list of suggestions to check out during your visit.fullsizeoutput_be3

Common Grounds– Common Grounds is the local coffee joint in town. Sitting across the street from Baylor University it has a unique, hip vibe. Live music is often featured and there is a large outdoor space to sit and relax while you listen to local talent. You can also grab some delicious ice cream from Heritage Creamery, just next door.

George’s– Whenever we go on a trip, we make it a goal to only eat local. No large chains for us–as we love meeting the locals. George’s is definitely the “hometown dinner.” The staff was so welcoming, the food was great, and atmosphere inviting.

Twisted Root Burger– These were possibly the best burgers we have ever eaten. The atmosphere is definitely fun, upbeat, and more of a college vibe. (Hello, Baylor is just a few blocks away.)  The food however, will knock your socks off. If you have a hankering for a good burger, don’t walk… run!

SHOP:
Of course if you are going to Waco as a Fixer Upper fan, you will be going to Magnolia Silos. But there are some other great shops you want to make sure not to miss. Here is a 
short list of places I loved and plan to go back to the next time around. 

The Findery– Just about a block south from the Silos this is a beautiful shop full of home decor, furniture, and boutique style clothing and gifts. The Findery is the perfect farmhouse chic style stop without the huge crowds. A perfect shopping destination if you need a break from the chaos and hustle and bustle of the Silos.

Harp Design Co– Clint and Kelly Harp may be known for their farmhouse tables but their shop is a darling representation of the quality and uniqueness behind Harp Design. Modestly priced items are perfect for any budget. Be sure to save some space for custom  wood letters, home decor, and even locally made jewelry. (Did I mention you can stay in their bed and breakfast, right next to the shop?)

JDH Iron Designs- Love the metal signs featured on the show? You can now drive a little out of town to Crawford, Texas and check out Jimmy Don’s shop for yourself! I’ve even talked a little with Jimmy Don via Instagram and he is such a fun, loving, and genuine person!

Some other cute shops include:
Gather
Junque in the Trunk
Redeemed Decor
Spice Village
Waco’s Downtown Farmer’s Market

SEE:

Waco has a lot of hidden gems fun for the whole family. So, if you are planning to take the kiddos along be sure to check out some of the area attractions. Here is a quick list of off beaten paths to check out if you need a break from shopping.

Bear Habitat
Cameron Park and Zoo
Dr. Pepper Museum
Hawaiian Fall Waterpark
Mayborn Museum Complex
Waco Hippodrome Theater

I hope you find this guide helpful for your trip to Waco! Magnolia is a great destination for everyone in the family. Be sure to schedule enough time to spend the whole day at the Silos, catch a meal at a hometown eatery, and support some other small shops and local attractions. As always go make today beautiful and follow me on Instagram for minute by minute updates! 

Featured

Gardening Gift Ideas

As spring approaches I can’t help but get bitten by the gardening bug. I am so excited to get outside and start planting flowers and vegetables this spring. It always takes a little investment up front so, I have been checking out my go to place, Amazon for inspiration.

I can’t wait to show you some of the fun and useful things I found. Check out some of these cute and practical ideas for your own garden or a friend! I’ve even included a couple humorous gifts that are perfect for a good laugh. As always, shipping is free for Amazon Prime Members.


These products are on my list to check out… even the humorous ones like How to Survive a Garden Gnome Attack: Defend Yourself When the Lawn Warriors Strike (And They Will) ,” our friends would laugh so hard at this one! I love the “Plant Lady,” shirt for myself and can use all the tools, pots, and resource vegetable garden book. And how adorable is the wooden window box? And all things Floret Farms is the perfect gift for anyone. Be sure to check these all out for yourselves!

As always, thank you for reading! I am so encouraged by your kind messages, likes, shares, and follows. Be sure to follow me on Instagram, Pinterest, or my Facebook page for more up to date coverage of our process. Have a great weekend, friends!

Featured

An Intro: So You’re Buying a Fixer Upper?

It can be so easy to browse Pinterest and think that little to no effort is needed to make a home look beautifully charming. There are bloggers, Instagram-ers, and Youtube stars that make it look all too easy. Popular television shows renovate entire properties in three weeks, with a behind the scenes crew of thirty or more construction crew members… whom you will never see. (And budgets out of this world). It’s hard especially when you are just starting out, to feel overwhelmed, inefficient, and under-talented. The truth is behind the smoke and mirrors real messes happen. It’s not so effortless.

Home renovation is not easy and it is something that takes a lot of time. It takes a lot of blood, sweat, and tears quite literally. I remember one evening when my husband was ripping out some old tile, countertops the blood part became very real. He still bares a scar.

10177291_10100201963745452_8646061843351416383_n

My Story
Interior design comes with practice. It is something I am learning overtime. Honestly, I was born with a need to create. I remember drawing detailed designs as a little girl. In fact, I wanted to be a fashion designer for most of my adolescence. Growing up, my creative side was semi encouraged, but I always had the voices saying I needed to get a “real degree.” So off I went to college to get a degree in International Business Administration.

My love for interior design was an evolution of sorts. It began when I moved out on my own. I went to college and bought all my dorm room decor with adulthood in mind. I remember friends would comment on how my room always looked homey, calm, and inviting. When I turned 21, I began an internship in Europe. That’s where I fell in love with historical (like, really historical) architecture. I started to really explore art, photography, and history that summer.

However, I still needed to learn… I had always been good at pairing things together, but talents develop the more they are used. After college I worked briefly as the head manager of an Estee Lauder. Additionally, I started taking peoples photos for some extra income. During that time, I started studying color. I starting learning what compliments what. And I learned that mistakes often lead to muddled, confusing messes. Mistakes are also the best teachers.

The Truth
Interior design isn’t for everyone. Some people have very “left sided minds” and think less creatively. That does not mean they can’t. It means then just need a little more help. That’s why jobs like “interior designer” and “interior decorator,” exists. If you are less creative, find someone local to advise you on your choices.

Home renovation is hard work. Especially, when you need to stretch a dollar. That’s why my blog exists. The goal of this is to inspire you, teach you, and help you with resources on how to do things. We are DIY-ers out of necessity and we have grown to love what we do.

Renovations are messy and chaotic. I cannot tell you how much dust I sweep and vacuum up daily while we are renovating this home. It’s not pretty and definitely doesn’t fit my “try to always have a nice, tidy home” personality. Always take that into consideration before a big project. Make sure it’s the right time for you and your family and that you have a realistic end date in mind.

Photos:
The first project we ever tackled in our first home. We had a lot of mudding, sanding, and painting to do. A couple years later we refinished the floor, the hearth, and I whitewashed the fireplace.

Sometimes mistakes happen, learn from them. When we bought our first home, we were trying to make the bathroom a little more livable while we saved up for an entire gut job. One weekend when Thomas was gone, I removed a floating shelf, repaired all the cracks and nail holes, and painted every inch. We chose a color that on the card looked bright and refreshing. It was indeed bright and it was the first thing to go a few months later. What did I learn? I will never buy a paint color without some very serious testing and that electric blue just isn’t my thing.

Photo: My mini-makeover was a mistake I learned with a simple paint color. But, I learned I will never do electric teal again. Thankfully, it did not make a come back when we overhauled a few months later due to a necessary pumping repair.

Taking care of your home is hard work and so worth it. The reality of home ownership is that maintenance is always necessary. I recommend when purchasing a home you budget for renovations and repairs even if the house seems perfect. We live by the rule that we always want to make a place we live in better, not worse. We care about our community and whomever may live in our home after us. And a small, wise investment now can pay off in the end. And yes, how you treat your home affects your neighborhood.

Lot’s of hard work goes into every project we do.

Owning a home comes with a ton of responsibility. Design is not easy or natural for everyone. With some practice, research, and heart anyone can have a home they love to live in. Some of the word’s most renown designers didn’t even start learning about design until they were adults… (Joanna Gaines, anyone?). If you are frustrated and looking for a change without knowing where to start ask a friend who has great taste or hire a professional.

I hope you enjoyed this post about fixer uppers. There is so much we have learned and so much we are still learning. Keep checking back for more advice, DIYs, tutorials, and more. Follow Midwest Southern on Pinterest and Instagram for daily updates.

Featured

Farm Inspired Dining Tables Under $500

I have been on the search for the perfect, inexpensive dining room table. We love our current table, for it’s sentimental value. However, it’s approximately 100 years old… and we don’t want it to take the wear and tear of everyday use. Add, an active toddler who occasionally finds themselves on top of the said, table doesn’t quite mean gentle during that everyday activity. I have been looking for something very specific as we recreate the space. And my search has proven to be a tough one.  

I have found several farmhouse tables that are beautifully done for under $500. There is a perfect mix between traditional farmhouse and modern farmhouse.  But it literally has meant hours upon hours of searching the internet. Hopefully, you’ll find these links helpful when searching for your own unique farmhouse style table.

[Click on the pictures to be taken directly to the specific price and item.]

ROUND TABLES:

Round Wood Paige Dining Table: Natural by World Market

Round Wood Paige Dining Table from Cost Plus World Market

HOMES: Inside + Out IDF-3840RT Round Dining Table Transitional

Madison Park Signature Helena Round Dining Table Reclaimed Grey See below

RECTANGULAR TABLES:

White Metal and Espresso Wood Ridgeby Dining Table by World MarketWhite Metal and Espresso Ridgeby Dining Table from Cost Plus World Market


Outdoor X-Frame Farmhouse Dining Table


Modway Alacrity Dining Table, Gun Metal


If you’re in the market for a new farmhouse dining room table, be sure to check out these budget-friendly pieces. All are perfect for that farmhouse look whether more modern or traditional. Stay tuned to see what we choose as we renovate our “Plain Jane,”  fixer upper into a sleek, modern farmhouse. Follow me on Instagram for more details and behind the schemes sneak peeks. 

Featured

Minted: Beautiful Independent Artistry

Your invitations hold all the special details of your big day. Don’t let them become a bad memory.

The holidays. If someone you know hasn’t gotten engaged, announced a pregnancy, or has some other life altering announcement you just aren’t paying attention. And phew, we have survived the chaos of most of the major holidays. Now to survive wedding season and the onslaught of wedding invites.

I was thinking the other day how much I loved our wedding… specifically our invitations. I can’t tell you how many people personally told me that they had never seen invitations like ours. Guests used words like elegant, unique, and sophisticated.

Honestly, there are a lot of elements that I wish I could have changed about our wedding. I didn’t have an event planner and planned the majority by myself from far away. I would have loved to had the funds for a swanky event coordinator to do all the grunt work. But the two major investments I did make can be seen throughout our home and are my fondest memories.

First, our photographer. The largest percentage of our budget went towards a photographer. This is the one thing I recommend you never skim on. After all, these are the memories of your commitment to one another. It’s the memories your future children will have to treasure as well. I have heard horror stories about cheap photographers or family members who volunteered their services. A kind “no, thank you,” is better than bitter regret.

Second, our invitations. Your invitations hold all the special details of your big day. Where it was located, what time, day, your parents’ names. We framed ours with several photos of our big day. Every once in a while I smile as I walk down the hall and see the faces of our best friends and the details of the day we became one. This will also hopefully leave details to generations after us to know a little more about who their family members were.

You can view some invitations from my favorite independent artists here. 

We purchased our invitations from a company called, Minted. They sell thousands of beautiful designs from independent artists all over the world. And the customer service? AMAZING! I never take customer service lightly. I worked in customer service for almost 10 years and boy I cannot stand when a company doesn’t serve its customers. Minted was phenomenal! I was able to call and talk to a real person who personally proofread, corrected, and walked me through proper wedding etiquette wording. He asked me questions like what I was envisioning for our ceremony and reception and worded it perfectly to match.

Hands down I cannot stress to you how happy I was with the company, product, and experience. Minted is hands down my go to for any stationary and printing needs. And they don’t just do wedding invitations. They sell stationary, art, gifts, and home decor! You can even purchase unique fabric from them! How neat?

I hope this article was helpful to you if you or a friend are searching for wedding invitations, art prints, gifts, or stationary. Be sure to refer any friends to this article and my unique link below! This will include free invitation samples with code, 3FREE. Valid until April 27th, 2018.

3 FREE wedding invitation samples from Minted.com with code 3FREE

Have an amazing day and as always make it beautiful! Follow me on Pinterest and Instagram for more inspiration. 

Featured

Designing a Space 101

I thought it would be fun to show you a couple different ways I personally decide how to design a space.

Hey there friends! I wanted to hop on and tell you a couple cool things. Firstly, our kitchen is starting to look and feel like a kitchen. It is still very much a construction zone. However, it’s functional and it’s starting to look pretty! We still have a lot to finish including tile, paint, drywall, hardware, flooring, and some electrical. I am hoping it will come together sooner as our days start getting longer and warmer.

With so many things needing to get done, it can be intimidating to even start a project. That’s why I wanted to give you some advice and real life experience on how I design a space for our home or a client.

When designing a space I tend to be a very visual person. I need to touch and feel the items before making a financial commitment… believe me it has saved us thousands! I highly recommend buying in person rather than online. However, I did find some AMAZING pieces online that will make the kitchen drool worthy… but they definitely were not our large ticket items.

My biggest tip for today is, get all your supplies together before you start and ask yourself some simple questions.

1. Do these colors compliment each other?
2. Will this make my room more cohesive?
3. Does it make me happy? (Include your better half in that too).
4. Will I still like this in 5 years?
5. Will this add financial value to the home?***

***Even though we plan to stay put for several years, we are always reminded that resale value matters not just for us but also for our community. That’s right folks, what your neighbors’ homes sell for will impact what yours will sell for, and vic versa. We believe we are doing justice to our friends and neighbors by being good stewards of our property!***

I thought it would be fun to show you a couple different ways I personally decide how I want to design a space. First, is my pre-purchase. Admittedly, I do much of this mentally. However, when you need a hand it’s always good to create what is called, a design board. Now, much of America uses Pinterest, as do I. And this is kind of like a Pinterest board only a little more formal. I use a program to make a collection of all my “ideas.” I make sure everything looks cohesive next to each other. Second, is the post-purchase but pre-use of anything you buy. This will allow for last minute mind changing if you decide your idea just isn’t what you thought. The first step though will hopefully save you from making costly mistakes.

The First Step.
(I included a thumbnail of my final choices for reference in the top, middle image.)

Laptop on Desk Employee of the Month Blog Graphic

Now that all my ideas are on one simple page, I can decide if this is indeed what we want to purchase and use for the renovation project.

The Second Step:
Bring all your major items together and review your questions.

IMG_3363

This is one example of how I take all my ideas and confirm if they go together before we do the tough work. Sometimes you just need to see how things flow together before you know you want to live with them.

I hope you enjoyed this little sneak peek of our kitchen! We will be so excited when all the work is finished. The best part though is we are making this house ours. It finally is starting to feel like our home. We have a long way to go from finished but we are so excited for the journey. Make your day beautiful, friends. And for more inspiration be sure to follow me on Instagram and Pinterest. There are so many new things planned as the seasons change.


Featured

How To: Basic Refurbishing of Wood Antiques

Antiquing is one of our favorite things to do as a couple… I know it doesn’t sound “manly,” but when you are married to a history teacher, antiquing is totally up his alley too.  We have been able to find some fun items over the years that have become staples in our home. But usually, when we buy something, it needs a little TLC.

So, I wanted to do a quick post on refurbishing antiques. For an example, I will showcase my early 1900s library desk that just so happens to be my office desk. Obviously, depending on the piece, refurbishing will be different for everything and everyone. But my main point is if it is a true historical piece, keep it’s integrity. It will be good to you if you’re good to it.

IMG_0450
Before (Top). After (Bottom). We purchased this from one of our favorite antique shops, The Nesting Place in Maryville, MO.

Step 1: Clean It Up

If you have a piece that is in pristine condition you may not need to do much more. Take a soft cloth or brush and make sure any debris are off the item. Next, dampen the cloth with simple water and wipe clean. If the item is extremely dirty and you will be truly refurbishing use some mineral spirits to get a good deep clean. Mineral spirits can damage any varnishes or top coats, so use wisely and always use with CAUTION.

Use any chemical where it is well ventilated and wear a mask, if possible.

Step 2: Sand off the Old.

When I got this library desk, you could tell it had been used as someone’s work bench. It had spent some time outside, lots of spilled paint in areas, deep scratches, and about an inch of dirt. It needed lots of love. I took an electric hand sander, medium grit sand paper, and began my hours of sanding every nook and cranny. When sanding always go with the grain, and focus on one section at a time.

After the first sanding. I sanded it down about four times. 

Step 3: Fix Any Damage.

Depending on the piece, you may need to repair any large cracks, broken knobs, wobbly legs. Most repairs can be done with some basic tools, wood glue, and yes more sand paper to make any repaired areas smooth before the next step. On my desk, it needed some intense sanding, new knobs, and some extra care inside the drawer.

Step 4: Stain or Leave Natural.

Depending on the type of wood you may choose to stain your piece. Yes, you can paint too… but remember this post is about real antiques and keeping their original integrity. I chose a red mahogany stain color from MINWAX to accent the natural colors I loved about this piece.

IMG_1550.jpg
After one coat of stain to accent the beauty in the imperfections and natural wood grain.

Step 5: Seal It Up.

Once your stain is the desired color and every area is evenly stained, it is time to protect all that hard work. I recommend using a water based, polycrystalline. It’s so easy to work with and cleans up with warm, soapy water. I recommend doing at least two coats. Allow each coat to dry and evenly apply with a smooth brush.

Here’s my quick Insta-Story on how to seal!

Step 6: Finishing Touches

I kept what I could to keep this piece as close to the original design. However, due to some broken knobs I needed to find something new. The drawer was also extremely splintery and rough. So, after sanding and deeply cleaning I used some decoupage glue and lined the drawers with some fun, neutral colored honey comb scrapbook paper I found at Michael’s, the craft store.

Do what makes you happy! If you have a piece that you want to paint, paint it. If you like the natural wood than just leave it natural. The point of this post is to just give you a few tips on how to make a piece of furniture better. So, keep these tips in mind the next time you go antiquing by yourself, with a friend, or your spouse!

If you enjoyed this post, be sure to share using the tabs below. Also give me a follow on Instagram! You’ll be able to see my Insta-Stories for quick how tos and updates on the blog and my life. 


Featured

A Date Night In With Wayfair

If you are a personal friend of mine, you know that Thomas and I are huge fans of Wayfair. We have purchased many furniture items from them for a fraction of the retail price. And yes, the shipping really is free! 

Hello all!

If you are a personal friend of mine, you know that Thomas and I are huge fans of Wayfair. We have purchased many furniture items from them for a fraction of the retail price. And yes, the shipping really is free! 

I thought it would be fun, with the holiday quickly approaching to do a short piece on Valentines Day, date nights at home, and some cute transitional decor pieces that you can use year round. Hopefully, this post will inspire you to keep the romance alive, stress less, find great decor, and even save you time and money.

engagement
Keep the romance alive with a date night in. Keep reading for some fantastic ideas and products you can only find at Wayfair.

Date Night In

As you know, parents don’t usually get a night off very often. So, date nights at home have become our personal go to. Here’s a few fun ideas for a great last minute date night in–Valentines Day or otherwise. And they are all something we personally love doing when we get an evening to ourselves, after the kiddo goes to bed!

  1. Game Night. Get the competitive edge going by playing your favorite board game or a few rounds of cards. Add some snacks and drinks to keep the fun rolling.
  2. A Romantic Movie Night. Make some gourmet popcorn, grab a cozy blanket to share, and your favorite bottle of wine.
  3. Pillow Fort Camp Out. This is fun and a little bit silly. But it was one of the most memorable date nights we did when we were first married. We made a huge blanket fort in the living room, grabbing all the pillows we had. Thomas and I spent the evening laughing, talking about our biggest dreams, and snuggling amongst the pillows.
  4. Recreate your first date, at home. For us? We met in a Barnes and Noble parking lot (yes, there is a story there), ate a magnificent Italian dinner, grabbed coffee, and walked along a lake on a cold December evening. So to recreate, we’d cook some pasta, make a cup of homemade espresso, and gaze at the stars snuggling under a blanket on the back porch.
  5. Surprise Your Spouse. I think the element of surprise is one puzzle piece that keeps a marriage fresh, exciting, and vibrant. Surprise your spouse with a basket full of their favorite things for a romantic night in. Keep it hidden and simply say, “We’re going to do something different tonight. Go grab that basket over there.” Some ideas for basket items are: candles, massage lotions, their favorite book, a cozy customized throw pillow, or their favorite snack. Add a romantic love note for an added bonus.

When planning your “date night in,’ don’t forget to do a little decorating for the occasion. I’ve included some beautiful decor pieces that you can find at Wayfair.

Transitional Decor

I’ve never been one to decorate specifically for Valentines Day… However, now that we have a little one, I think decorating for holidays has become a bit more exciting. Sticking to frugal living, I am still not one to drop hundreds of dollars for decor pieces that I will only have up for a few days. So, I’ve mastered what I call transitional decor; pieces I can use all season long or into the next season. Here are a few pieces I think would be easy transition pieces into Easter, spring, and possibly summer. Take a peek!

Peonies+in+a+Glass+Vase+with+River+Rocks+and+Faux+Water
A perfect example of transitional decor… from my friends at Wayfiar!

Here’s a quick reference to all my favorite Wayfair items for a cozy date night in and transitional decor.

Cranford Throw
Cranford Throw
Eileen French Press Coffee Maker
Kate Spade New York 2-Piece Bridal Party Mug Set
Kate Spade Bridal Party Mug Set
Whirley-Pop 9-Qt. Tub and Love Jar
Wayfair Basics Stemless Wine Glass
54-Piece Tabletop Stacking Game Set
Jumbo playing cards
Jumbo Playing Cards
Wicker Storage Trunk
Heritage White Gardenia Scented Jar Candle
Tulip Wreath
Tulip Wreath
Bender 16-Piece Dinnerware Set
Dakota Framed Textual Art
Peonies in a Glass Vase with River Rocks and Faux Water
Rose Floral Arrangement
Still His/Hers Coffee Mug Set
Personalized Brush Script Mr. & Mrs. Throw Pillow

I hope this is helpful as you plan your Valentine’s Day with your significant other, friends, or family. I think all these pieces make for great gifts, inexpensive decor, and pieces that you can use all year round. As always make today beautiful. Be sure to follow me for more ideas by subscribing to this website, following me on Instagram, and my Pinterest!

xoxo,

Mandy

Featured

Work in Process: The Kitchen

Hello all! I’ve been quiet on here this week. We are knee deep in our big renovation project. Read for my thoughts on our progress and plans thus far!

Hello all! I’ve been quiet on here this week. We are knee deep in our big renovation project. Read below for my thoughts on our progress and plans thus far!

I am glad to say that the kitchen is well under way to being semi-functional and livable. There is still a ton of work to do. However, I am finally able to see my vision become a reality. There were so many unplanned updates that we had to do, that the idea of taking on this project seemed a little overwhelming throughout the planning process.

Originally, we were planning to keep the 1970’s custom cabinetry, updating with new hardware and professional paint. However, when we moved in we quickly realized that 75% of the cabinets were severely worn beyond repair. Additionally, to simply connect a dishwasher, it had to be fed through broken countertops to be plugged in. We knew this would be the biggest indoor project but we didn’t fully understand how much until we lived in the space.

Adding Functionality

The one small change that has made all the difference is finally being able to move the refrigerator where it belongs. Previously, we had to plug it into what we now have as a dining room area. Once we removed the cheap (non-original) cabinets, we were able to remove all the “reclaimed” pallet wood, replace sheet rock, and create an actual space for the fridge to be fully functional. And it has made a HUGE difference in functionality.

The kitchen is a left-handed kitchen and I am a right handed cook. This has been a challenge. Try moving absolutely everything from the one side you are use to using to the other. Difficult, huh? This has been my constant battle when attempting to cook meals. So, we are making some slight moves in the kitchen to add function for righties everywhere! And it will make all the difference.

Next, the pantry is literally in the hallway… this has been challenging for organization and just functionality as far as if I need anything quickly, I have to walk about 20 feet away and hope I can get to the ingredient in time. This too will be fixed by adding an actual pantry in the actual kitchen. The current pantry will be getting a much needed face lift and act as what it likely was intended as—a coat closet.

A sneak peek at a few behind the scenes inspiration pieces… and a secret project in the beginning stages!

My advice for you is, when designing a space focus on not just what will be “pretty,” but what will be functional for you and your family. How can you increase functionality and efficiency? How can you make life easier, cleaner, and less stressful? My goal is that every room will be functional for our family’s needs. 

As always, thank you for reading! I am so encouraged by your kind messages, likes, shares, and follows. Be sure to follow me on Instagram, Pinterest, or my Facebook page for more up to date coverage of our process. Have a great weekend, friends!

Featured

Kitchen Inspiration

Check out some of the most inspiring kitchens from some amazing designers around the country!

As we begin our kitchen renovation, we increasingly get excited for the installation of new cabinets, new countertops, new paint colors, and all the other beautiful things that come with a big renovation. As I have discussed in previous posts when doing any kind of DIY project one must research like crazy!

Boy, have we been researching! I feel like I could give you a thesis on kitchen cabinets, an analogue on price differences and quality between stores, and a dictionary of terms used by interior designers across the country. But I am still learning. As we work on installing more cabinets, replacing drywall, and finishing our own countertops I wanted to link some of my favorite kitchens I have seen the last few weeks. And there are some stunning kitchens out there! What talent we have across this beautiful continent!

720170b6a2815815239ea532d60a97a1

First things first, I saw this beautiful antique, European baker’s cart and it took my breathe away. It’s natural patina, beautiful finish, and large caster wheels are just the beginning. The rest of the room is left simple, making this piece shine as big as those beautiful windows!

Designed by Micheal and Alison Brewer of, Gray Wade Design Development.

Photo: Brie Williams. Stylist: Sandra Mohlmann

067ac001df4072477a285e0666e39d35

I stumbled upon this gem at a different angle. Again, I fell in love with the island-it’s natural wood finish, valuable storage, and white quartz countertop. This kitchen is classic with a clean, modern twist!

Designed by Patti Wagner. Island made by J. Albrecht Design.

d0dbdc81bd13096a248e67c970a56ae1

 Who would I be if I left out the one and only Joanna Gaines? I loved the episode of the “Baker House.” Ms. Baker is one blessed and deserving lady. I love the European, antique island on a vintage rug. And the blue and white tiles are my absolute favorite, reminding me of my grandmother’s collection of blue and white china.

Designed by Joanna Gaines on HGTV’s Fixer Upper.

b189b301408e7c257bee7f7c654e76c4

Classic, clean, and modern; a combination that can never go wrong. The bold contrast between black and white with a natural element of dark stained butcher block is simple elegance meets modern minimalism.

Designer is unfortunately unknown, (let me know if you know who this design belongs to).

Photographer: Bethany Nauert.

95d3c1789e2eb35896deeefc6556e60a

I’m a sucker for natural light, period. And do those windows and double french glass doors do the trick or what? This kitchen is classic, simple, and elegant. I love the small accent of gold and decorators touch of navy against a bright white pallet.

Designed by Amie Corley Interiors.


What’s your favorite design? Feel free to comment below, share on Pinterest, or check out more ideas on Instagram! I hope this little post inspired you in some way or another. Have a beautiful day, friends!

Featured

How To: Shiplap Any Wall On A Budget

This is the tutorial you’ve all been waiting for! SHIPLAP. Oh yes, I am letting you in on the secret to how we totally made over our lumpy, bumpy living room wall into a fabulous farmhouse chic entryway.

This is the tutorial you’ve all been waiting for! SHIPLAP. Oh yes, I am letting you in on the secret to how we totally made over our lumpy, bumpy living room wall into a fabulous farmhouse chic entryway. The best part? We did it all on a tight budget! And it was so easy Thomas, (my husband) wants to add it to other areas in the house! Score!!!


Now lets be honest. This is a faux shiplap wall. But really no one would notice without studying it, that it’s not authentic tongue and grove Texas pine like what Joanna Gaines is so known for uncovering under plaster. But did I already mention the price tag? Authentic shiplap would cost about $78 for 6 unfinished boards you can find [here].

My cost for our 200 square foot wall? About $60… paint and all.

Now along with anything do your homework… depending on where you live you may be able to find supplies locally for more convenience or a better price. For the purposes of this blog, and the fact that I have readers nationally and internationally, I am linking products from big box national retailers. However, we did buy the lumber from the local lumber yard so, I really couldn’t beat the customer service or convenience, yay for small businesses! (And a hint for the locals who read my blog.)

How ToLet’s begin shall we? As with every project, one must first gather your supplies. Some are optional but most are required to make this project work properly. Adjust depending on your environment or size of project.

Supply List:
Plywood- Link [HERE].
Miter or Circular Saw- This is ours for reference: [HERE].
Jig Saw- (Depending if you have any outlets to go around).
Nail Gun.
Nails- (for the nailer you use).
Nickels.
Wood Filler- (Optional).
Paint- Link [HERE].
***if you’re doing this in a bathroom, kitchen, or basement that tends to have moisture use KILZ to prevent mold, mildew, and warping…
Paint Brush- Link [HERE].
Pen or Marker.
Ruler and/or Measuring Tape.
Sanding Block or Electric Sander.

Plywood

Now that you have your supply list lets start on how you want to get your supplies. The plywood you will be using comes in large sheets. We asked our local lumber yard to cut them down for us. I know Home Depot will also cut them for you, for free depending on the store. We had them cut each strip 6 inches tall by the 8 foot long. Depending on the size of the wall and your available supplies you can ask to get them cut in shorter strips along with the longer 8 foot strip. You will want to stagger the long and shorter strips for the farmhouse shiplap look.

Sanding Plywood

If the blade they use on the plywood is new, you will have very little “clean up.” If the blade is older the plywood may splinter. In that case, lightly sand off any frays or splinters before attaching to the wall.

Equipment 

If you’re just starting out with your home renovation journey you may not have a nail gun, electric saw, or electric sander… that is OKAY! Many smaller hardware stores [Westlake: ACE Hardware] and larger stores [LOWES and Home Depot] have equipment rental available. I can’t tell you how often we had to rent equipment from ACE in our first home… A LOT! We are also so thankful for friends who have allowed us to borrow tools when we were in need. Lifesavers!

Wood Filler, Totally Optional!

Depending on the look and time you want to put into the project you can use wood filler to cover up where you put the nails. In our situation, we wanted a more authentic farmhouse vibe. Plus, we didn’t want to spend hours sanding off wood putty. But I know some people would go crazy seeing the teeny tiny nail heads… not me.  DO YOUR THING!

Let’s get to work shall we?

Step 1:

Prep your wall… prep your wall in one coat of white paint (or whatever you choose to paint the shiplap in) as you will still see small lines between each strip. Take off any molding or trim.

IMG_2418
Before.

Step 2:

Find the studs and mark the studs. This is where your ruler and marker come in. We easily found the studs because the wall had never been properly mudded below. We easily saw the sheet rock screws and just followed it up making a line to the ceiling.

fullsizeoutput_14f5
Mark where your studs are located.

Step 3:

Get your nail gun ready, you’re about to nail the first strip! Start from the bottom and work your way up. Put two nails on either side of the strip where the stud is located…like [ : ] .  You may put one more nail between the studs for added security and to prevent bowing. Thus, your nails will look similar to this… [  :  •  :  •  :  ]

Step 4:

Measure for your next piece, cut accordingly, and nail in place. For us this was about 4ish feet after the 8… It made the next section super simple.

Step 5:

Row Two!!! This is where your nickels come in. Place a nickel between the first row and the second row. This is the space you will want evenly between each strip, creating that shiplap look! I would say, use about 3 nickels per strip. Your shorter strip will go above the longer. So, if you have an 8 foot strip below you will use a 4 foot strip above, and an 8 foot above that one (third row).

Also, remember to use a jigsaw if you have outlets, thermostats, and other areas you need left open. Measure twice, cut once!

fullsizeoutput_14eb.jpeg

Continue the process. Until you’ve got a completely covered wall. 

*** Small gap between the ceiling and the last board? We have that too. Eventually, we plan to put crown molding in the room so we will just install that over the gap. You can also cut a strip to match the area you want covered. ***

Finishing Touches:

Now that you have the wall covered it’s time to either, use the wood putty (cover up nail heads, let dry, and sand smooth) or just paint! We wanted a smooth but authentic finish so we hand painted the area with three coats. If you’re fancy, you could use a sprayer to get a more “professional” coat.

Option for Edges:

If you don’t care for a raw edge you can easily use a small trim strip (like Alexandria Moulding) to encase the edges. This is something we might do once we finish the kitchen renovations, as it is the adjoining room. Here is a link to a strip idea: [HERE].

Kitchens, Bathrooms, and Basements, Oh MY!

I mentioned this above, but if you plan to use this in an area of your home that has a tendency for moisture be sure to use a preventative type paint… We just use KILZ, it’s most trusted, seals, and blocks moisture, smoke, and mildew. Here is a link: [HERE].

Use a jigsaw for outlets, thermostats, and light switches.

That’s a Wrap!

I hope you found this little tutorial helpful in your own farmhouse endeavors! Please, let me know if you have questions, ideas, or if you found this tutorial helpful. Comment below, SHARE with your friends on FACEBOOK, INSTAGRAM, PINTEREST, and other social media channels! Now, go make your day beautiful! 

xoxo,

Mandy

Featured

My Favorite Trends of 2018

Remember Midwest Southern is not about trends but about adding personality to the home you love to live in… maybe that means embracing a trend every once in a while.

I think it’s always fun to see what will start hitting stores the last part of December into early 2018. (Can you believe it’s almost 2018?!?!) I am already loving many looks of different home furnishings and products that are soon to hit stores. Be prepared for woods accents, metal finishings, shades of purple, and minimalist design.

You can check out my PINTEREST for some design inspiration [and sources] when it comes to these elements!

2018 Interior Design Trends
See the sources for these photos on our PINTEREST board: “2018 Design Trends.”

Woods and Nature

Love the look of natural elements? You’ll see lots of wood elements from small furnishings to large home interior accents like beams, live edge countertops, and shelving.

Metal Finishings

You’ll see brass, gold, and bronze anywhere from lamps, wall art, centerpieces, to hardware. I am always a fan of beautiful metallic finishes when done right!

PURPLE

To be honest, I haven’t been the biggest fan of Pantone’s Color of the Year choices for the past few years. But there’s no denying that purple is in for 2018. You’ll see lilacs and lavender making a big comeback! You may also see a twist on last year’s Pantone Color of  the Year…green! Specifically, more of an emerald green popular, especially with light pink accents and gold.

Minimalist Design

Scandinavian design has been in for quite sometime… Clean lines, neutral colors, and natural elements not only are timeless but perfect for almost any space, due to their versatility. I think you’ll be seeing more of this in the coming year. And what better excuse than to declutter and save money, right? Minimalism is here to stay.

I hope you enjoyed this quick read. Remember Midwest Southern is not about trends but about adding personality to the home you love to live in… maybe that means embracing a trend every once in a while. Remember to find us on other corners of the internet… Instagram and Pinterest!

Featured

My Design Process

It’s no secret that everyone thinks a little bit differently when it comes to their home. And every designer thinks differently when designing a space for themselves or their clients. I wanted to walk you through a few of my many “design processes” to not only give you a little insight as to how I function but hopefully help YOU as you rethink your space.

It’s no secret that everyone thinks a little bit differently when it comes to their home. And every designer thinks differently when designing a space for themselves or their clients. I wanted to walk you through a few of my many “design processes” to not only give you a little insight as to how I function but hopefully help YOU as you rethink your space.

IMG_2654
When choosing a new color or material I literally lay out all my options. I ask critical questions about the impact of a design choice.

Think Critically

When I  am designing I tend to ask myself a lot of questions. I think it’s important to think critically to avoid making costly mistakes in the long run. I for one don’t want to have to paint a wall 10 times before I am satisfied with how the color turns out. When you factor in $50 for a gallon of high quality paint and a few supplies you’ll save yourself a lot of money and hassle when you think critically.

Space

The first thing I think about is the space of the room. Is it small, large, square, rectangular? How much natural light will the room receive? What part of the house is it in? What will happen here? These are all valid questions to find answers to before you even start. When it comes to my personal style, I would never put a dark color in a small room that receives little to no natural light… especially if it is a common area like a living room, dinning room, or kitchen. However, if it were a small bedroom that received a lot of natural light, had clean lines, and was straight forward in design I may consider going darker for a more relaxing environment, (in fact I did… you’ll see that in a future post).

Flow

How does the space you are designing go with the flow of the entire home? Does it clash? Is it dark when everything else is light? When you walk though the space does it make sense… does it feel like you are going with the current or swimming upstream or perhaps it is more like a stagnate swamp of confusion. If it doesn’t flow rethink the space. How can you make it more functional and inviting?

Collectiveness 

Very similar to “flow,” making sure everything is collective in style will help lessen confusion in your space. I am not saying that you have to have everything matching… and it is totally cool if you love eclectic styles! But, ask yourself this, “Does this item complement the room?” Or maybe it sticks out like an ugly, sore thumb. Does it make sense to you? After all, you are the one that is living there. Don’t live with something that drives you insane. You owe yourself that!

Declutter

Ever need to clear your head? I think redesigning a room is similar… sometimes you just need to start from scratch and that is OKAY! Often when redesigning a space, I will clear all the furniture I can move to the next room, sit in the middle of the floor and reimagine where I think things would work better. And you know what, it works! (Bonus, it gives you a great opportunity to deep clean all those corners you can’t get to normally.) The same goes for making a place more functional. The less you have cluttering up a room the better.

fullsizeoutput_a36.jpeg
Clearing everything out can help you clear your head and create a new vision for your space. Plus, it’s an easy way to deep clean!

Contentment

I know, I know. This is a design blog. And the word contentment isn’t something one will see very often in a place like this. But it is my personal opinion that if you aren’t content you won’t be happy. Maybe there’s some deep spiritual or psychological influence at play… but honestly it’s just about being human. We all want more, we all have dreams and desires and sometimes we just need a change of pace. My challenge is to ask yourself, “Will I be content if _________ happens?” If the answer is, “No,” rethink your priorities. And honestly, if you don’t get excited over your new couch, new paint, or latest home buy than why did you purchase it?

Here’s a great book by Rachel Cruze to read when it comes to contentment and your money: [HERE].

*Not Sponsored*lylnt.jpg

These are just a few ideas, thoughts, and questions I personally use and genuinely hope you find them useful as well. Remember that when you design your home do what makes you happiest. Design your space for you not anyone else and certainly not to impress anyone else…

Did anything stick out to you? Feel free to comment below I would love to hear your feedback.

As always, thank you for reading my posts! I am so encouraged by all your kind comments. Be sure to follow me on Instagram for more behind the scenes looks into my everyday life. You can also find me on PINTEREST. 


Featured

DIY Outdoor Holiday Garland

So, I thought it was the perfect challenge to myself. I absolutely adore any opportunity to make something beautiful. Especially, if I can do it for next to nothing.

I was scrolling through Instagram the other day and noticed not just one of my Insta-buddies but four or more making these adorable natural garlands. Many with multiple layers of natural foliage and seeded eucalyptus. Eucalyptus is very popular this year and I love it! Specifically, Seeded Eucalyptus is my absolute favorite “green” element; it has interesting texture, an olive colored tone, and it smells so refreshing.

If you read my post last week, you remember my mentioning how people in the past used natural elements to decorate. They used things they could find in their own backyard. So, I thought it was the perfect challenge to myself. I absolutely adore any opportunity to make something beautiful. Especially, if I can do it for next to nothing.

Enter a trip to the farm.

My husband’s family owns a beautiful spread of farmland. And it’s such a treat to go out there and just be. It’s close enough to town but seems far enough to just breathe and get away from any distraction. My husband was nice enough to take both our little girl and me to get some natural foliage. He made the climb to a wild cedar tree on a ridge and trimmed off a small stack for me to use. I tell you ladies, find a guy who will do crazy things just to make you happy. I am one blessed lady… doubly blessed because he loves Christmas more than anyone I know. 

We went back home and I began my little craft project.

I had about 6 foot of faux green garland that had lights left over from last year, just sitting in storage. So, I decided to use that on one of the railings on our little front porch. After seeing what method would be best to wrap and secure the greenery, I began to add different “sprays” of real greenery throughout. The faux garland is bendable so I simply just had to twist those sprays around the real ones to secure.

FullSizeRender-11
Step 1. Drape faux greenery around the railing. I chose to cover this railing for several reasons. New paint coming in the spring!

I love the volume that different branches gave the garland. Since we have only lived in the home for 2 months, we haven’t been able to do many updates to the front. We replaced the front door but still have much to do once spring and summer temperatures hit. One of those projects will be painting the entire exterior including the little front porch, that is currently not so pleasing to the eye. (Keep that in mind when judging how badly the old paint is chipped, haha).


I wanted to add a different natural element. And I wanted to make sure it would be friendly in case the birds got hungry. I “upcycled” some mandarin oranges that were going to go bad before we could eat them. But in order for them to be able to be used for decorating, they needed to be dehydrated.

Here’s what I did to dehydrate and get them ready to be added to the garland. You could do this to any citrus, temps and times may vary due to type and your altitude. (A hint/shout out to my Wyoming and Colorado readers).

– Cut citrus into 1/4″ rings

– Place on parchment lined baking sheet with about 1/4″ to 1/2″ in between slicesfullsizeoutput_15a0.jpeg

-Heat oven to 200°F

-Bake for 1 hr

-Flip

-Bake for 1 hr, more

-Flip

-Heat oven to 250°F

-Bake for another 15-20 minutes, ***optional: put them on an oven rack above the parchment to allow the dry air to get to both sides.

-If they still seem juicy leave them in longer… just be careful not to burn.

-Turn oven off

-Leave in oven overnight… or on counter.

Next came the fun part. Once I had all my citrus dried, I just needed to thread them with some string. I used white crochet string, a large quilting needle, and a large string (6 feet or so) of jute. Many of these steps would be a good option to have the kiddos help.

-Simply thread your needle with the crochet string.

-Thread each mandarin slice, close to the rind, with approximately 3-4 inches of thread.

-Cut, and tie two knots around the rind of the dehydrated citrus.

-Tie around the jute string. I did 3-4 knots to make sure it was tight and secure.

-Cut off remaining string.

-Repeat until you have your desired amount of slices and length.

-Reorder according to your liking. You will still be able to adjust when you add this to the greenery in the next phase.

FullSizeRender-7
Thread the needle.
FullSizeRender-9
Tie and Cut.
FullSizeRender-8
Voila!

The FINAL PHASE… drape around your greenery according to your liking and secure.  You can also take a few of your leftover citrus slices and tie directly to your branches for a more scattered look. Or if you don’t want any of your string to show, simply use green floral wire and secure to individual branches. This is the best option for a seamless, more professional look. 


As always, thank you for reading! Please be sure to share this via social media and word of mouth! You can always find me on Instagram, Pinterest, and a little Facebook. Comment below if you enjoyed this little DIY! Now, go and make today BEAUTIFUL! 


How To: Remove Popcorn Ceilings

Popcorn ceilings. This is a trend I am glad is ending. If you have a popcorn ceiling in your home chances are it survived the 80s and 90s… it also probably shows a lot of wear and tear, dust, and cob webs. When we moved into this home one of the first things to go was the popcorn ceilings in the bedrooms, hallway, and kitchen. Why? They were filthy. And popcorn in a kitchen is a bad idea… no matter what.

Thankfully, popcorn really is not the hardest thing to remove but it is messy. Very messy. Here is a quick how to explanation of how to removed popcorn ceiling and texture from your home. And a few things we learned during our experience.


Removing Popcorn Ceilings 101
There are only a couple things you need when removing popcorn.

First, something to cover your workspace. For the bedrooms we knew the old, worn out, stained carpets had to go. So, it was easy we weren’t worried about protecting them. Had we of been, we would have used extensive plastic sheeting and painters tape to keep them in place. Here’s a link to what I mean:

Second, you will need a sprayer–just a simple $20 garden sprayer will work. Here’s one that I suggest using:Third, you will need a larger sized, metal sheetrock mud tool. Here’s what we used…
Your supplies list is pretty simple… and of course you will want a good ceiling paint after all is said and done. Overall, your biggest cost is time and clean up. Let me explain how exactly, to put all these tools to use.

The Step by Step to Removing Popcorn Texture

1. Cover anything you don’t want getting dirty with plastic sheeting. Use a good painters tape to help keep in place.
2. Use sprayer filled with warm tap water. Lightly spray section by working section and let sit for 15 minutes.
3. Once area has sat, use sheetrock tool to lightly scrape off popcorn texture. 
*Attach this to a WET-VAC hose & vacuum up damp texture while scraping.*
4. Continue until entire area is smooth.
5. Finish with clean up and paint. Use a good sheetrock mud in the instance of any accidental gouges.

Pretty easy folks! The biggest pain is the clean up. It’s an easy day project that requires a little muscle with little chance of complication. I highly suggest a Wet-Vac to help with clean up– it’s a lot easier when you can simply let a machine do the heavy work! Here’s a decently priced machine you can use for any clean up project.

I hope you found this article helpful! You really can do this project with little time and only a small amount of products. Be sure to follow Midwest Southern on Instagram, Pin this article on Pinterest, and share with your friends. Midwest Southern is all about empowering you to make your home look beautiful on any budget. Thanks for reading and make today beautiful!


Looking for other products to help your project along? Check these out:

Storage and Organization

Cleaning Supplies

Small Business Spotlight: Farm Life Outfitters

Intentionality in relationships and creating genuine connections was a big goal for me this year, writing about it in a post a few weeks back. I want to send less meaningless texts, call more, visit often, and make someone’s day. That’s why I am so excited for these cute note cards from my friend, Michelle. Michelle owns a small shop called, Farm Life Outfitters. She and her husband design farm inspired clothing, coffee mugs, home decor, and these cute little note cards!

fullsizeoutput_16a1
Michelle’s note cards are blank to write a special message for any occasion. Each card also is accompanied by a matching envelope. Card photos by: Midwest Southern Blog


Michelle also sends a portion of her profits to help end human trafficking and slavery. 

fullsizeoutput_169b

MEET MICHELLE: OWNER OF FARM LIFE OUTFITTERS

I hosted a small interview with Michelle to get to know her and her business a little more closely.

IMG_4678 - Michelle
Michelle, owner of Farm Life Outfitters.


Q: What inspired you to start your business?

A: The idea really came out of nowhere and my husband was being given the same idea. We knew then that we had to do something with it! And once I started researching country and farm apparel, I found nothing cute, simple and tasteful. So we decided to create it!

Q: What do you hope customers get from your products?
A: Our products display the beauty of God’s creation (farm animals and country living) and Scripture. And whether you follow us on social media, or meet us at a craft show or simply order from our store, we hope you feel a bit of that love for God and His handiwork.

Q: Why do you personally think notecards make such a great gift to someone?

A: I believe the best reason people should buy note cards is that we have become so impersonal as a society. Everything is handled via email and social media now. I believe a handwritten note adds such a sense of intentionality that we are just simply missing from our every day lives now.


A major goal of this blog is to help small shops promote their products. I’ve been there and getting a small shop off the ground is hard work, so I love celebrating shops like Farm Life Outfitters. Michelle and her husband work hard to get their customers high quality products that they love. So, if you love farm inspired items go check her shop out!


Thank you for reading and be sure to go check out my giveaway of an entire lamb pack of note cards from Farm Life Outfitters on Instagram. Follow myself and Michelle for updates and new ideas… As always, make today beautiful if not just for yourself, for a friend too! 


Love small business and other indie designers?

Shop other small business designers here: MINTED